1320 words, 4 mins
typora这款markdown编辑软件非常好用,在mac上使用起来体验也很棒,让人忍不住想在上面书写,如何结合github让编辑到发布更加顺畅?
将blog目录作为typora工作目录
图片保存路径设置
参考这篇博客, 在typora里,粘贴图片后,自动保存到对应目录,并且让博客也能正确显示.
- 在根目录添加media目录
- 每篇文章会生成一个对应的目录来存放图片,非常清晰易管理
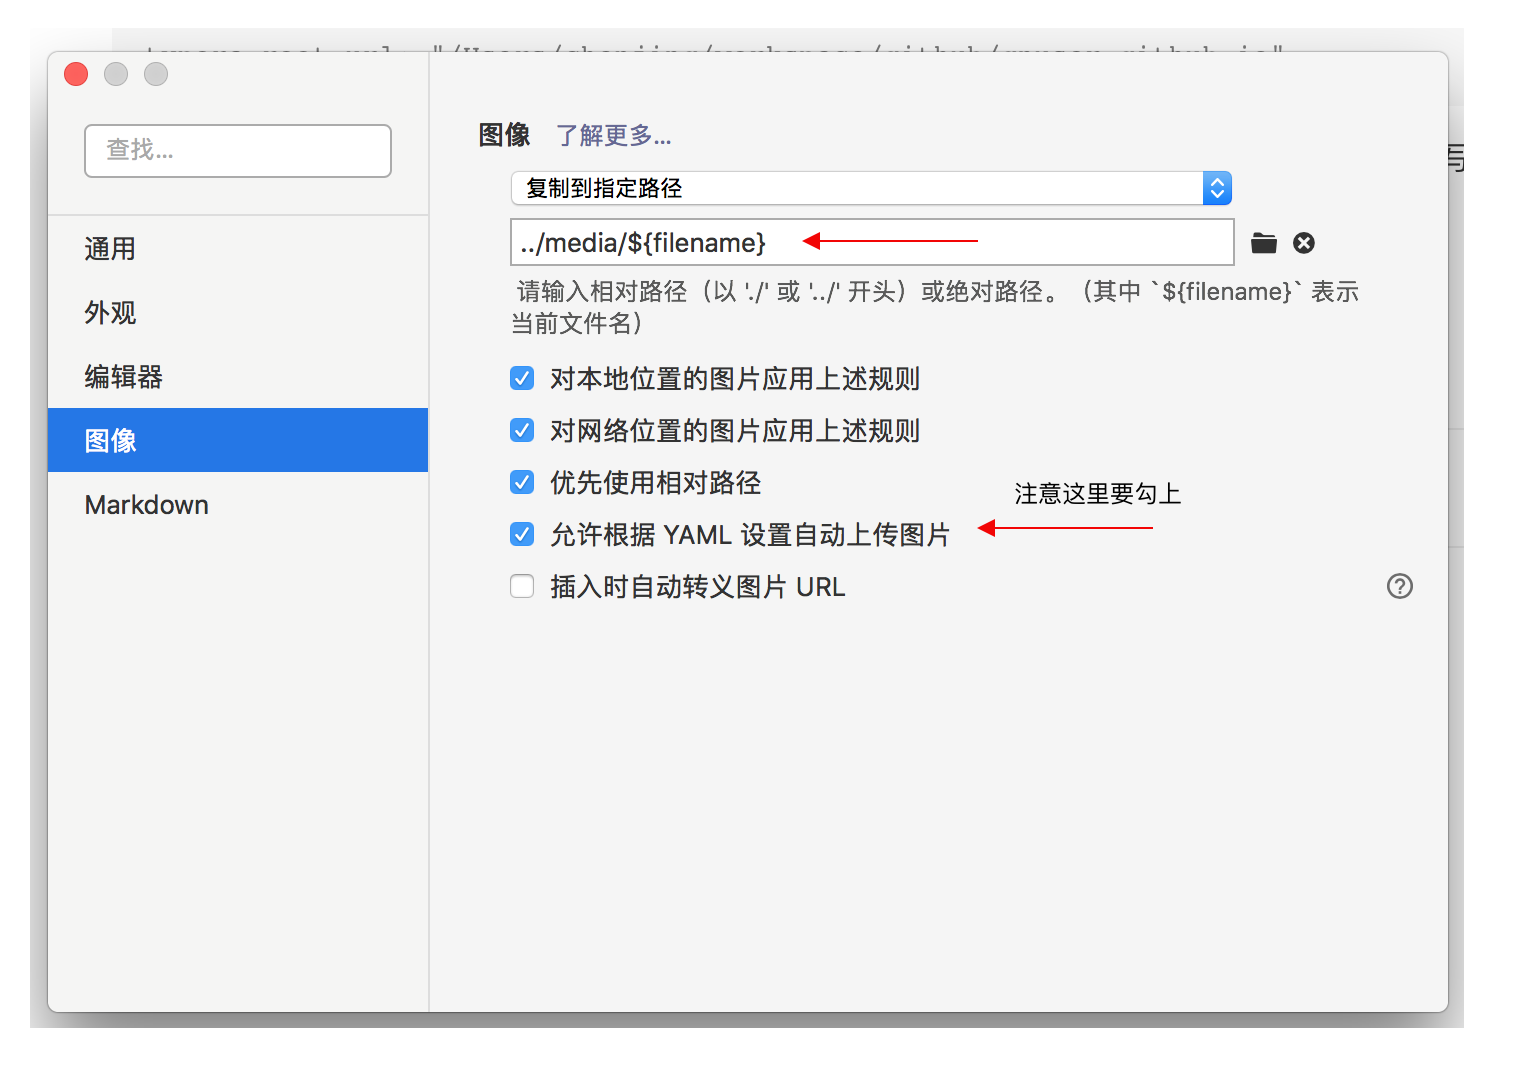
设置图片保存方式,注意两个红箭头的地方

设置typora-root-url
上图中的允许根据YAML设置自动上传图片,就可以在文档头部的yml配置中添加
---
title: 使用typora编写blog
date: 2020-03-08 11:30 +0800
typora-root-url: "/Users/chenjing/workspace/github/gnuser.github.io"
---
这样提交github也不需要再更改路径
自动填写typora-root-url
添加一个shell脚本newpost.sh
#!/bin/bash
#
#    This script creates a new blog post with metadata in ./_posts
#    folder. Date will be generated according to the current time in
#    the system. Usage:
#
#        ./newpost.sh "My Blog Post Title"
#

typorarooturl="/Users/chenjing/workspace/github/gnuser.github.io"

title=$1

if [[ -z "$title" ]]; then
    echo "usage: newpost.sh \"My New Blog\""
    exit 1
fi

bloghome=$(cd "$(dirname "$0")"; pwd)
url=$(echo "$title" | tr '[:upper:]' '[:lower:]' | tr ' ' '-')
filename="$(date +"%Y-%m-%d")-$url.md"
filepath=$bloghome/_posts/$filename

if [[ -f $filepath ]]; then
    echo "$filepath already exists."
    exit 1
fi

touch $filepath

echo "---" >> $filepath
echo "title: ${title}" >> $filepath
echo "date: $(date +"%Y-%m-%d %H:%M:%S %z")" >> $filepath
echo "typora-root-url: ${typorarooturl}" >> $filepath
echo "---" >> $filepath
echo "" >> $filepath
echo "<!--more-->" >> $filepath


echo "Blog created: $filepath"
添加新文章使用命令
./newpost.sh "word counts and estimated reading time expect"
PREVIOUS加速github访问速度
NEXT文章字数显示以及阅读时间预估